 How-to
How Can You Prevent Voltage Drop in Landscape Lighting?
Last Updated: October 26, 2026
Quick Summary
To prevent voltage drop landscape lighting, use thicker wire gauge for longer runs, measure voltage at fixtures to confirm the problem, and choose a wiring layout that keeps individual runs under 100 feet. Aim for no more than 10% total voltage drop by calculating wire size based on total wattage and distance.
- Voltage drop occurs when electricity travels long distances through thin wire, causing fixtures to dim and colors to shift.
- Measure voltage at the transformer output, first fixture, and last fixture; readings below 10.8 volts on a 12-volt system indicate voltage drop.
- Choose a wiring topology, daisy-chain, home-run, hub-and-spoke, or loop, based on run length, fixture groups, and whether even brightness matters.
- Start troubleshooting by checking transformer output voltage, inspecting connections for corrosion, and counting total wattage before upgrading wire.
Table of Contents
- What Voltage Drop Is and Why It Occurs in Landscape Lighting
- Recognizing Symptoms: Dim and Uneven Lights
- Measuring Voltage Drop: Safe Testing Procedure and Measurement Points
- Choosing the Right Low-Voltage Landscape Lighting Wire Gauge
- Using a Landscape Lighting Wire Size Calculator and Reference Chart
- Planning Your Landscape Lighting Wiring Layout for Balanced Performance
- Landscape Lighting Troubleshooting: Diagnosing and Fixing Common Issues
- Getting Professional Help with Your Landscape Lighting System
- Frequently Asked Questions
What Voltage Drop Is and Why It Occurs in Landscape Lighting
Voltage drop in landscape lighting happens when power weakens as it travels through wire: the farther electricity travels, the more resistance it meets, and voltage decreases. Prevent voltage drop landscape lighting by understanding how your system loses power.
In a 12-volt system, a fixture rated for 12 volts may receive 10 volts or less, so it dims and colors shift.
Several factors cause voltage drop:
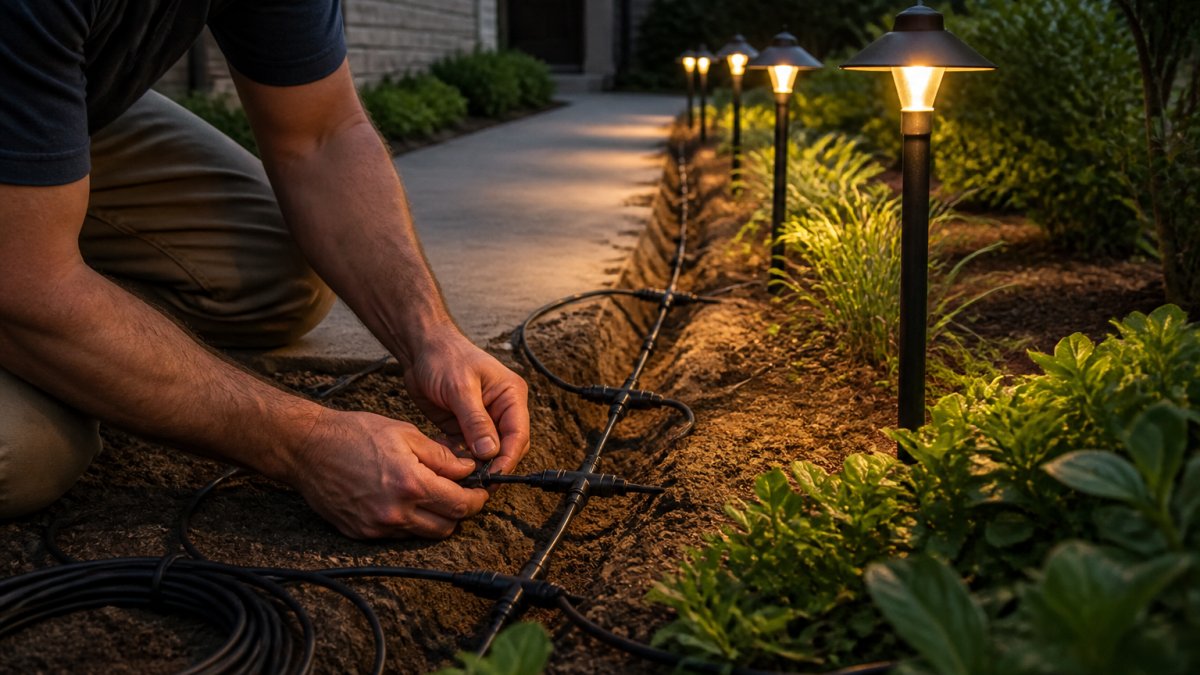
- Long wire runs from transformer to fixtures
- Thin wire gauge that can't handle the electrical load
- Too many lights on a single circuit
The most common problem isn't defective fixtures or bad transformers, it's voltage drop from improper wire sizing and layout.
Recognizing Symptoms: Dim and Uneven Lights
Dim lights are the first sign of voltage drop: fixtures farther from the transformer appear noticeably dimmer than those close by.
Watch for these symptoms:
- Lights near the transformer shine bright
- Lights at the end of the run are significantly dimmer
- Some fixtures barely glow at night
Uneven lighting happens because voltage decreases progressively. The first fixture gets nearly full voltage and the last gets much less.
Don't assume dim lights mean broken fixtures. Test voltage first. A simple multimeter check reveals whether the problem is voltage drop or a failed light.
Measuring Voltage Drop: Safe Testing Procedure and Measurement Points
Testing voltage drop requires only a basic digital multimeter, which costs under $30.
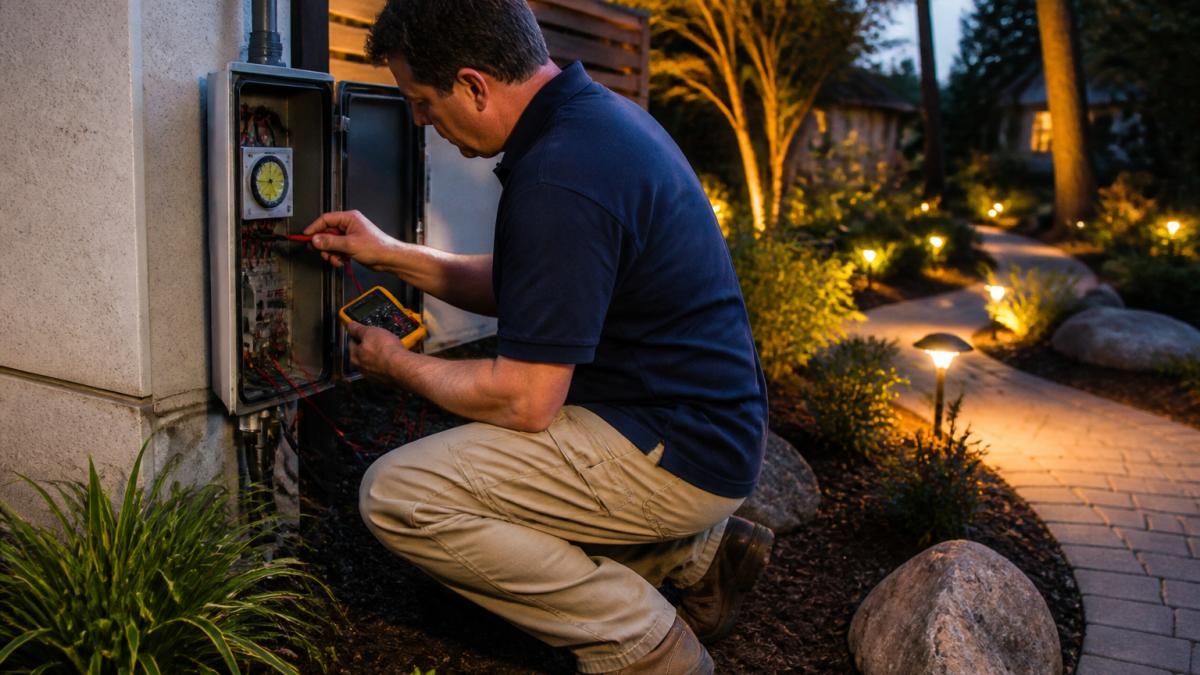
Measure voltage at three key points:
- At the transformer output, This is your baseline
- At the first fixture, Shows initial loss
- At the last fixture on the run, Shows total loss
Turn off power before connecting anything. Set the multimeter to DC voltage, then touch the red probe to the positive wire and the black probe to the negative wire.
Safe testing steps:
- Turn off the system completely and wait 30 seconds for capacitors to discharge
- Use one hand only when testing live circuits; never touch both wires simultaneously
- Keep the multimeter away from water and test during daylight when possible
A healthy 12-volt system reads 12 volts at the transformer, 11.5 to 12 volts at the first fixture, and no less than 10.8 volts at the last. Anything below 10.8 volts means voltage drop is affecting performance.
Choosing the Right Low-Voltage Landscape Lighting Wire Gauge
Wire gauge is measured in AWG (American Wire Gauge). Common landscape lighting sizes are 12-gauge, 10-gauge, and 8-gauge.
Thicker wire costs more but prevents voltage drop; most issues stem from wire too thin for the distance and load.
Choose wire gauge based on three factors:
- Total wattage of all fixtures on the run
- Distance from transformer to the farthest fixture
- Acceptable voltage loss (aim for less than 10%)
A 12-gauge wire works fine for short runs under 50 feet with light loads.
The cost difference is modest, and upgrading prevents expensive problems later. Choose thicker wire when in doubt.
Using a Landscape Lighting Wire Size Calculator and Reference Chart
Most wire-sizing advice stops at "use thicker wire for longer runs," which leaves you guessing. The reliable way to prevent voltage drop is to calculate it and compare the result to a target. Here is the formula, a worked example, and a reference chart.
The voltage-drop formula
For a two-wire low-voltage circuit, voltage drop is calculated with Ohm's law applied to the round-trip wire resistance:
VD = (2 × L × I × R) ÷ 1,000
Where:
- VD = voltage drop in volts
- L = one-way length of the run in feet
- I = current in amps (total fixture wattage ÷ system voltage)
Common copper resistances per 1,000 feet at roughly 75°F (24°C):
| Wire Gauge (AWG) | Ohms per 1,000 ft |
|---|---|
| 14-gauge | 3.07 |
| 12-gauge | 1.93 |
| 10-gauge | 1.21 |
| 8-gauge | 0.764 |
| 6-gauge | 0.491 |
These are nominal values; resistance rises with temperature, so treat results as best-case.
Worked example
Suppose you have five 20-watt fixtures on one run, 80 feet from the transformer to the farthest fixture, and you are considering 12-gauge wire.
- Total load: 5 × 20 W = 100 W
- Current: 100 W ÷ 12 V = 8.33 A
- Round-trip length: 2 × 80 ft = 160 ft
- Resistance for 12-gauge: 1.93 ohms per 1,000 ft
- VD = (160 × 8.33 × 1.93) ÷ 1,000 = 2.57 V
A 2.57 V drop on a 12 V system is about 21%, far beyond the recommended 10% (1.2 V) limit.
Now try 10-gauge:
- VD = (160 × 8.33 × 1.21) ÷ 1,000 = 1.61 V, about 13%, still above target.
Try 8-gauge:
- VD = (160 × 8.33 × 0.764) ÷ 1,000 = 1.02 V, about 8.5%, within the 10% target.
That is why a 100-watt, 80-foot run that "looks fine" on a shortcut chart can still underperform.
Reference chart
The chart below assumes a 12 V system, a 10% voltage-drop target (1.2 V), and copper wire. Find your total wattage and one-way run length, then read across for the minimum gauge.
| Total Wattage | 25 ft | 50 ft | 75 ft | 100 ft | 150 ft |
|---|---|---|---|---|---|
| 25 W | 14 | 14 | 14 | 12 | 12 |
| 50 W | 14 | 12 | 12 | 10 | 10 |
| 75 W | 12 | 12 | 10 | 10 | 8 |
| 100 W | 12 | 10 | 10 | 8 | 8 |
| 150 W | 10 | 10 | 8 | 8 | 6 |
| 200 W | 10 | 8 | 8 | 6 | 6 |
How to read it: a 100 W load at 75 ft needs 10-gauge; the same load at 100 ft needs 8-gauge. Round up to thicker wire between columns.
Using the chart with LEDs and halogens
The chart is based on wattage, so it works for both. LEDs typically draw a fraction of equivalent halogen wattage, so a run that needed 10-gauge with halogens may be fine on 12-gauge with LEDs. Don't assume, add up actual fixture wattages from the labels, not equivalent light output.
Planning Your Landscape Lighting Wiring Layout for Balanced Performance
Wire gauge gets the attention, but topology, how cable is routed from transformer to fixtures, often decides whether a system performs evenly. Here are the four common low-voltage topologies, their trade-offs, and when to use each.
The four topologies
1. Daisy-chain (series-style) run
One cable leaves the transformer, visits each fixture in turn, and ends at the last one, cheapest in cable and fastest to install.
- Strength: minimal wire, simple trenching.
- Weakness: voltage drop accumulates along the chain, so the last fixture is always the dimmest. Adding a fixture anywhere affects everything downstream.
- Best for: short runs (roughly under 50 ft) with few, low-wattage fixtures, or as a feeder to a hub.
2. Home-run (star) layout
Each fixture or small group gets its own cable pair back to a multi-tap transformer terminal. Every run is independent.
- Strength: each fixture sees nearly transformer voltage; a problem on one run does not affect others; easy to balance and expand.
- Weakness: more cable, more terminals, higher material cost, and more cable to bury.
- Best for: larger properties, mixed fixture types, and any system where evenness matters.
3. Hub-and-spoke
- Strength: cuts total cable versus full home-run while keeping local runs short, so voltage drop stays low.
- Weakness: the feeder itself must be sized for the full downstream load; the hub needs a weatherproof, accessible connection point.
- Best for: spreading fixtures across a large yard where a single central transformer location would otherwise force long runs.
4. Loop (ring) layout
The cable leaves the transformer, visits the fixtures, and returns to the transformer (or a second terminal), forming a loop so current reaches each fixture from two directions.
- Strength: the most even voltage profile of any topology because the return path halves the effective resistance to each fixture.
- Weakness: uses the most cable of any single-circuit option and requires careful polarity and connection discipline at the return.
- Best for: long perimeter runs, path lighting around a loop, and situations where evenness matters more than cable cost.
Side-by-side trade-offs
| Topology | Cable used | Evenness | Ease of expansion | Best use |
|---|---|---|---|---|
| Daisy-chain | Lowest | Lowest | Hard (affects downstream) | Short, light runs |
| Home-run | Highest | Highest | Easiest | Complex or mixed systems |
| Hub-and-spoke | Moderate | High | Moderate | Large yards, central hub |
| Loop | High | Very high | Moderate | Perimeter and path runs |
Choosing a topology
Work through these questions in order:
- How far is the farthest fixture from the transformer? If it is under about 50 ft and the load is light, a daisy-chain may be fine. Beyond that, plan to split the load.
- How many separate fixture groups do you have? Path lights, uplights, and accent fixtures often want different run lengths and wattages. Home-run or hub-and-spoke lets you size each group independently.
- Will you add fixtures later? Home-run and hub-and-spoke leave spare terminals and capacity; daisy-chains do not.
- Is evenness critical? For a formal path or a facade wash, loop or home-run gives the most uniform result.
A common pattern is to combine topologies: a heavy feeder to a hub, short daisy-chains from the hub to path lights, and a separate home-run for accent fixtures. Make the choice deliberately rather than defaulting to a single long chain.
Layout practices that reduce voltage drop regardless of topology
- Place the transformer centrally to shorten the longest run.
- Keep individual runs under about 100 ft where practical; split longer runs at a hub or with a second feed.
- Use multi-tap transformer outputs (commonly 11 V, 12 V, 13 V, and sometimes 14 V) to raise voltage on the longest runs without rewiring.
Landscape Lighting Troubleshooting: Diagnosing and Fixing Common Issues
Dim lights don't always mean voltage drop. Diagnose correctly before spending money on fixes.
Test these in order:
First, check transformer output voltage.
Second, measure voltage at fixtures as described earlier. If voltage is normal there, look elsewhere.
Third, inspect wire connections.
Fourth, count total wattage. Overloaded circuits pull excess current, which creates heat and raises resistance.
Common fixes in order of effort:
- Tighten all wire connections
- Clean corroded terminals with a wire brush
- Upgrade to thicker wire on problem runs
Start with the easiest fixes. Many voltage drop problems resolve with just tightening connections or adjusting the transformer tap.
Getting Professional Help with Your Landscape Lighting System
Some voltage drop problems require professional assessment. Complex systems, old installations, or safety concerns warrant expert help.
Integrity Home Technologies specializes in landscape lighting installation and troubleshooting. We diagnose voltage drop issues accurately, design efficient wiring layouts, and upgrade systems.
Our process starts with measurement: we test voltage at multiple points, calculate wire sizing needs, identify the root cause, and explain options clearly so you choose the fix that fits your budget and goals.
You can landscape lighting installation in Northern Kentucky, KY for professional setup. Or review our full outdoor lighting installation services to see what's possible. For systems needing repair, get a free estimate so we can assess your specific situation.
Professional installation can help ensure proper performance.
Frequently Asked Questions
What is the recommended voltage drop for landscape lighting?
Most landscape lighting systems should maintain a voltage drop of no more than 10% between the transformer output and the farthest fixture. For a 12-volt system, this means your fixture should receive at least 10.8 volts. Exceeding 10% voltage drop causes noticeable dimming and shortens LED lifespan. Professional installers design systems to stay well within this threshold by using appropriate wire gauge, limiting run length, and distributing load across multiple feeds when necessary.
How do you choose the right wire gauge for low-voltage landscape lighting?
Wire gauge depends on two factors: the distance from transformer to fixture and the total wattage on that run. Longer runs require thicker wire (lower gauge number) to compensate for increased resistance. A 50-foot run with 100 watts of fixtures might need 10-gauge wire, while a 20-foot run with the same load could use 12-gauge. Use a landscape lighting wire size calculator or reference chart that accounts for both distance and load. Thicker wire costs more upfront but prevents voltage drop and eliminates costly troubleshooting later.
Does a longer wire run cause landscape lights to dim?
Yes. Longer wire runs increase electrical resistance, which causes voltage to drop before reaching fixtures at the end of the run. This dimming becomes visible when run length exceeds the capacity of your wire gauge and transformer output. A 100-foot run on 12-gauge wire will dim noticeably; the same run on 8-gauge wire may perform acceptably. Preventing this requires either using thicker wire, shortening the run, or splitting the load across multiple separate runs from the transformer.
How do you diagnose voltage drop in a landscape lighting system?
Use a multimeter or voltmeter to measure voltage at the transformer output and at the farthest fixture on each run. Record both readings. If the difference exceeds 10% of your transformer's rated voltage (more than 1.2 volts on a 12-volt system), voltage drop is the problem. Check wire gauge, run length, and total wattage on that run. Also verify the transformer is set to the correct tap and that no wires are corroded or loose at connection points. If readings are low at the transformer itself, the transformer may need adjustment or replacement.
Voltage drop in landscape lighting is solvable. Understanding wire gauge, run length, and wiring layout gives you control. Test your system. Measure voltage. Choose appropriate wire. Plan smart layouts. Most voltage drop problems disappear with these fundamentals in place. For complex systems or uncertain situations, professional installation ensures reliable performance and beautiful outdoor lighting that lasts.