 Ultimate guide
Outdoor Lighting Design Tips for Modern Homes
Last Updated: November 2, 2026
Quick Summary
Good outdoor lighting starts with a written plan, not fixtures: walk your property at night, map zones by how you use each space, and place light where it serves safety, navigation, or atmosphere. Layer ambient, task, accent, and safety light, aim fixtures so bulbs stay hidden, and waterproof every connection to prevent failures.
- Stagger path lights along one side of a walkway so pools of light overlap slightly.
- Use bulbs in the 2700K to 3000K range to render wood, stone, and foliage warmly.
- Put step lights on their own switch or smart control so safety lighting runs separately.
- Seal splices with gel-filled or silicone-sealed connectors rated for wet locations.
- Separate circuits and dimming let you shift mood from bright cookout to quiet evening.
Table of Contents
- Why Modern Homes Need a Lighting Plan, Not Just Fixtures
- Building an Outdoor Lighting Design Plan That Actually Works
- Outdoor Lighting Placement: Where the Light Should Actually Go
- Deck and Patio Lighting Ideas That Hold Up to Real Use
- How to Protect Outdoor Lighting Connections From Moisture
- Layering Light: The Difference Between Lit and Well-Lit
- Common Outdoor Lighting Mistakes Homeowners Make
- Get a Free Estimate for Your Outdoor Lighting Project
- Frequently Asked Questions
Why Modern Homes Need a Lighting Plan, Not Just Fixtures
Most homeowners buy outdoor lighting the way they buy a garden hose: they grab whatever looks decent, install it in an afternoon, and wonder why the yard still looks flat after dark.
At Integrity Home Technologies, we've spent more than 20 years installing low-voltage and outdoor lighting systems.
The stakes go beyond curb appeal. The Illuminating Engineering Society publishes recommended practices for residential exterior lighting, and the core principle is simple: light should serve a purpose, whether that's safety, navigation, or atmosphere.
Below, we break down how to build a plan, where light actually belongs, and the mistakes that cost homeowners the most.
Building an Outdoor Lighting Design Plan That Actually Works
A working outdoor lighting design plan answers three questions before you spend a dollar: what happens in each outdoor space after dark, what should the eye see first, and what should stay in shadow. Skip those questions and you're guessing.
Start With How You Use the Space After Dark
Walk your property at night and note where you actually go. The grill, the fire pit, the path to the shed, the step down to the driveway. These are your priority zones. A common mistake is lighting the front of the house beautifully while the back steps stay dark enough to trip on.
Write down the times you use each zone, too. A dining patio gets used at 7 p.m. in summer; a walkway gets used at 11 p.m. year-round. That timing tells you which circuits need to be separate and which need dimming.
Map Zones Before You Buy a Single Fixture
Divide the property into zones: entry, path, deck, patio, garden beds, and any focal points like a mature tree or a stone wall. Each zone gets its own goal. Entry zones prioritize safety and welcome. Garden zones prioritize depth and texture. Path zones prioritize even, low-level guidance.
Sketch it on paper. Mark fixture locations, note the direction each one should throw light, and label the purpose. This sketch becomes your shopping list and your installer's brief. If you'd rather hand the whole thing to a professional, you can request a quote from Integrity Home Technologies.
Outdoor Lighting Placement: Where the Light Should Actually Go
Placement matters more than fixture count. Three well-placed lights outperform ten scattered ones, and the guiding rule is to light what people want to see, never the source itself.
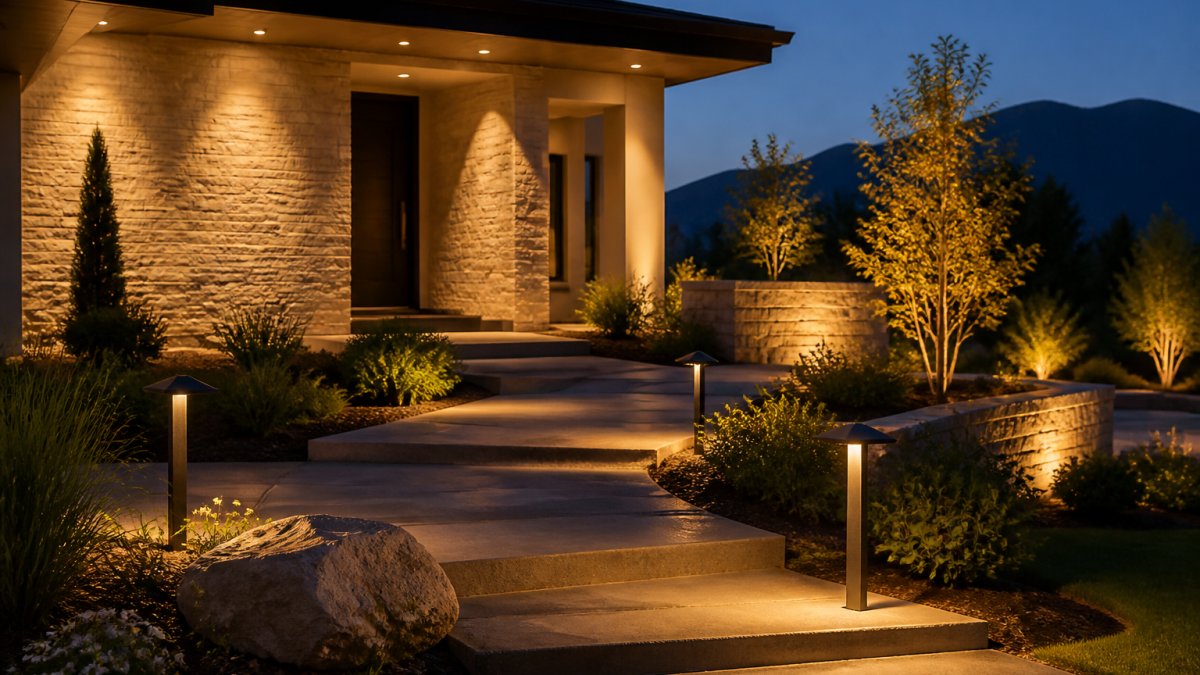
- Path lights: stagger them along one side of a walkway rather than lining both sides like an airport runway. Space them so the pools of light overlap slightly.
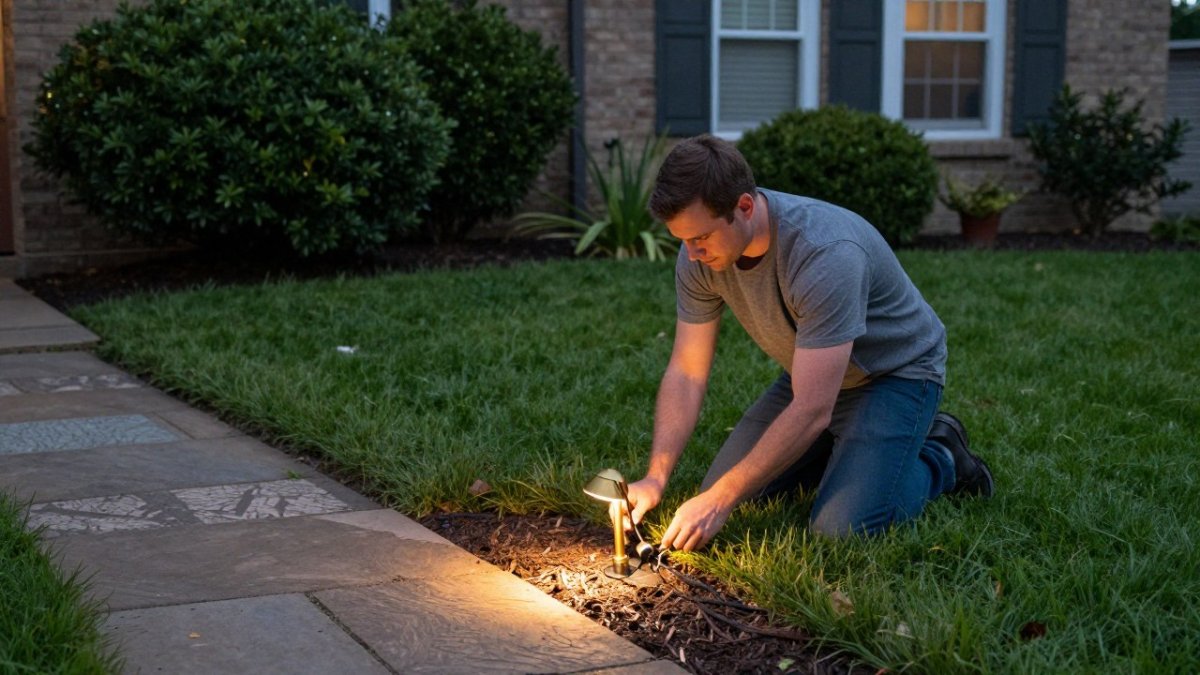
- Uplights: aim at tree canopies, architectural columns, or stone features. Keep the fixture hidden in the mulch or behind planting.
- Downlights: mount in eaves or tree limbs to wash walls and steps with soft, even light.
- Step and hardscape lights: recess them into risers and retaining walls to mark level changes without glare.
The single biggest placement error is pointing a fixture at the viewer. If you can see the bulb from the street or the patio chair, the light is aimed wrong. Shield it, angle it, or move it. For properties where the goal is making the whole yard read well from the street, a professional installer can handle the aiming and shielding that DIY kits often miss.
Deck and Patio Lighting Ideas That Hold Up to Real Use
Deck and patio lighting fails for one reason: it's chosen for looks and installed without regard for weather, traffic, and how the surface drains. The ideas below hold up because they solve a real problem first.
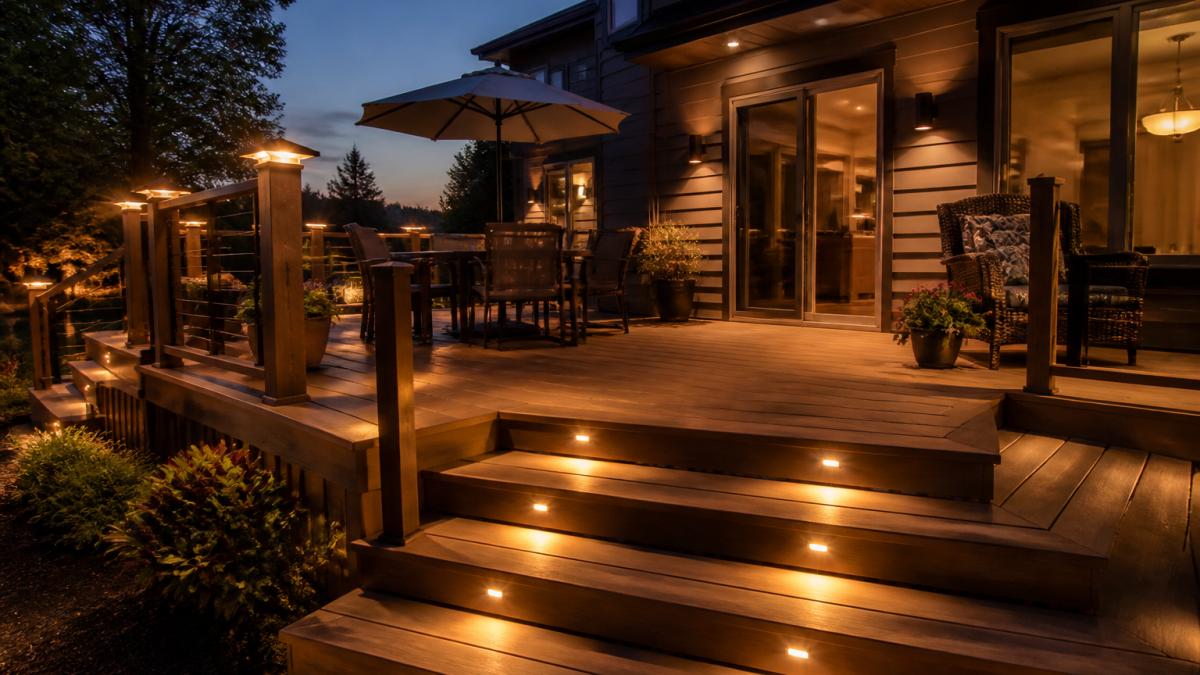
- Recessed riser lights on every step. They mark the edge without glare and survive foot traffic.
- Post cap lights on railing posts for soft, even ambient light across the deck surface.
- Under-railing strip lighting for a wash of light that doesn't shine in anyone's eyes.
- Hardscape wall lights on retaining walls and seat walls to define the patio perimeter.
- Low-voltage uplights tucked into planters for height and depth.
What most guides miss is circuit planning. Homeowners who want to use their patio after dark can have patio lighting installed. Homeowners who want the deck genuinely usable after dark can plan the lighting around how the space is actually used.
How to Protect Outdoor Lighting Connections From Moisture
Moisture is what kills outdoor lighting systems, and it almost always enters at the connection, not the fixture. Every splice, wire nut, and transformer tap is a potential failure point, and a system that works fine in July can be dead by the first hard freeze.
Why Water Always Finds the Weakest Connection
Water doesn't need a hole. It moves along wire strands by capillary action, wicks into a loose splice, and sits inside a fixture housing that looked sealed on installation day. Add freeze-thaw cycles and the expansion cracks the seal further. That's why a deck lighting system that "keeps failing every couple years" usually has one bad splice, not ten bad fixtures.
Protect connections with these practices:
- Use gel-filled or silicone-sealed wire connectors rated for direct burial and wet locations.
- Point every connection downward and keep it above grade where possible.
- Leave a drip loop in the wire before it enters a fixture.
- Use waterproof junction boxes at every branch point.
- Keep transformers off the ground and under cover.
The National Electrical Code sets requirements for wet-location wiring and low-voltage systems, and it's worth knowing that "outdoor rated" on a package does not mean the connection is waterproof. It means the housing is.
Layering Light: The Difference Between Lit and Well-Lit
A single layer of light flattens a space. Layering builds depth: ambient light for general visibility, task light for specific activities, accent light for focal points, and safety light for paths and steps. A well-layered yard has all four, and each layer serves a different job.
Think of it as foreground, middle ground, and background. Path lights handle the foreground. Patio and deck lighting handle the middle. Uplighting on trees and architecture pulls the background forward.
The other half of layering is control. Separate circuits and dimming let you shift the mood from bright and functional during a cookout to low and quiet for a late evening. Smart low-voltage controllers make that a phone tap rather than a walk to the transformer.
Common Outdoor Lighting Mistakes Homeowners Make
The same handful of errors show up on nearly every property we assess. Fixing them costs less than adding fixtures.
- Too many fixtures, too little purpose. More light does not mean better light.
- Cool white bulbs everywhere. Bulbs in the 2700K to 3000K range render wood, stone, and foliage warmly; cool white makes a yard look clinical.
- No shielding. Visible bulbs create glare and darken everything around them.
- One circuit for the whole yard. No control means no flexibility.
- Ignoring the transformer location. It needs ventilation, cover, and access.
- Skipping the connections. As covered above, this is where systems die.
Watch out: burying splices in soil without a waterproof connector is the single fastest way to lose a circuit. Water reaches the splice within a season, and the failure often shows up as a dead run rather than an obvious break.
These are the recurring errors we find on nearly every property, along with the fix that costs less than adding fixtures.
| Mistake | Fix |
|---|---|
| Too many fixtures, too little purpose | Fewer fixtures with a clear purpose |
| Cool white bulbs everywhere | Use bulbs in the 2700K to 3000K range |
| No shielding | Shield or angle fixtures so bulbs aren't visible |
| One circuit for the whole yard | Separate circuits and dimming for control |
| Ignoring the transformer location | Give it ventilation, cover, and access |
| Skipping the connections | Use waterproof connectors at every splice |
Get a Free Estimate for Your Outdoor Lighting Project
A good lighting plan is worth the effort, but the execution is where most projects fall short. That's the honest challenge: the design is the easy part, and the installation, aiming, waterproofing, and control setup are what determine whether the system still works three winters from now.
Integrity Home Technologies has installed low-voltage and outdoor lighting in the area for more than 20 years, with a 5.0 rating across 41+ Google reviews. We offer an expert assessment of your project needs at no cost and clean, careful work that respects your property. If you want a system that's planned, protected, and built to last, get a free estimate.
Frequently Asked Questions
How do you plan outdoor lighting for a modern home?
Start with how you use each zone after dark, then map the zones on paper before buying fixtures. A good outdoor lighting design plan covers pathways, entry points, and gathering areas separately, with a fixture count and voltage drop estimate for each run. Walk the property at night with a flashlight to test angles and shadows. That one step catches most placement problems before any trench is dug.
Where should outdoor lights be placed around a house?
Prioritize safety and function first: steps, walkways, the front entry, and the driveway edge. Then add accent light for architecture and trees. Keep fixtures out of the direct line of sight from seating areas, and aim them so they wash walls and foliage instead of shining into windows or a neighbor's yard. Outdoor lighting placement is mostly about what you don't light, not just what you do.
What outdoor lighting is best for decks and patios?
Low-voltage LED step lights, post cap lights, and recessed deck lights work well because they sit close to the surface and stay out of the way. For patios, consider wall sconces, string lights on a dimmer, or uplights on nearby trees for ambient glow. Choose fixtures rated for wet locations and make sure every connection point is sealed, since deck and patio lighting ideas fail most often at the joints, not the fixtures.
How do you protect outdoor lighting connections from moisture?
Use waterproof gel-filled connectors or heat-shrink butt splices instead of plain wire nuts. Point every connection downward, keep splices above grade in a junction box, and leave a drip loop so water runs off the wire instead of into the fitting. Seal fixture entries with silicone where the manufacturer allows it. These steps are how you protect outdoor lighting connections from moisture and get more than a couple of seasons out of a run.
How can you prevent corrosion on outdoor lighting connections?
Corrosion comes from moisture plus dissimilar metals, so match connector materials to the wire and avoid twisting copper against aluminum. Use tinned copper or marine-grade connectors in humid or coastal conditions, apply dielectric grease inside sealed splices, and check connections annually. If a fixture flickers or dims, the splice is usually the culprit, not the bulb. Replacing a corroded connector costs far less than rerunning a whole circuit.
How many layers of light does a modern landscape need?
Three layers cover most homes: ambient light for general visibility, task light for steps and paths, and accent light for trees, walls, and architectural features. A fourth layer, moonlighting from above, adds depth if you have tall trees. Keep accent fixtures on a separate control from path lights so you can dim or switch them independently. Layering is what separates a lit yard from a well-designed one.
Your yard doesn't need more fixtures. It needs a plan, proper placement, and connections that survive the weather. Get started with Integrity Home Technologies and turn your outdoor space into something you actually use after dark.