 Ultimate guide
Low Voltage Wiring for Home Theater: Ultimate Guide
Table of Contents
- What Is Low Voltage Wiring and Why It Matters for Home Theater
- Types of Cables and Cabling Standards for Home Theater
- Home Theater Speaker Wire Gauge and Low-Voltage Wire for Speakers
- Surround Sound Speaker Wiring Installation
- Home Theater Prewiring for New Construction vs. Retrofitting
- Installation Essentials: Mounting Brackets, Wall Plates, and Cable Management
- Future-Proofing: 8K, Bandwidth, and Smart Home Integration
- Step-by-Step Low Voltage Wiring Installation Process
- Frequently Asked Questions
Last Updated: October 7, 2026
What Is Low Voltage Wiring and Why It Matters for Home Theater
Low voltage wiring for home theater refers to cables operating at 50 volts or less, designed to safely transmit audio, video, and data signals throughout your entertainment space. Unlike line voltage wiring that powers lights and appliances, these cables handle delicate signals that demand precise shielding to prevent interference.
Low Voltage vs. Line Voltage
The difference comes down to safety, signal integrity, and installation requirements. Line voltage carries 120 or 240 volts and demands rigid conduit, professional licensing, and strict code adherence.
The practical implication: low voltage wiring for home theater lets you route cables through existing walls, attics, and crawl spaces without triggering line voltage permitting and inspection. That flexibility still requires routing cables correctly and avoiding interference sources.
Safety Standards and Electrical Code Requirements
Low voltage wiring must comply with the National Electrical Code (NEC), specifically Article 725, which governs Class 2 and Class 3 circuits. The code specifies minimum separation distances between low voltage and line voltage cables, typically 2 inches or separate conduit when running parallel.
Most jurisdictions require low voltage cables rated for in-wall use (CL2 or CL3 for residential) so the jacket won't propagate fire if insulation is compromised.
Types of Cables and Cabling Standards for Home Theater
Selecting the right cable type is where most home theater installations succeed or fail. Mixing standards or using undersized conductors introduces signal loss, latency, and intermittent failures.
Cat5 and Cat6 Ethernet Cables
Cat5e supports up to 1 Gbps over 100 meters; Cat6 supports up to 10 Gbps over 55 meters.
Cat6 uses thicker copper conductors and tighter twists, reducing crosstalk and electromagnetic interference. When running ethernet through conduit or behind walls, don't exceed the maximum bend radius (typically 4 times the cable diameter for Cat6); tight bends cause signal degradation and breakage.
Termination matters as much as the cable: use Cat6-rated keystones and patch panels, since Cat5e connectors with Cat6 cable defeat the performance advantage.
HDMI and Coax Cables
HDMI cables transmit uncompressed video and audio over a single connection, supporting up to 8K at 60Hz on certified cables (HDMI 2.2 Specification Overview).
Coax cables carry video signals (composite, component, or RF) and are increasingly replaced by HDMI and ethernet, but remain relevant for cable television feeds and satellite receivers.
When running HDMI through walls, keep it separated from power lines and other high-frequency sources; HDMI is susceptible to interference from fluorescent lighting, dimmer switches, and microwave ovens.
Home Theater Speaker Wire Gauge and Low-Voltage Wire for Speakers
Speaker wire connects amplifiers to speakers and demands careful gauge selection; the wrong gauge introduces voltage drop, reducing power delivery and causing audible distortion, especially in bass.
Selecting the Right Gauge
Speaker wire gauge is measured in AWG (American Wire Gauge); lower numbers mean thicker conductors and lower resistance. For runs under 50 feet, 12 AWG is standard; 50-100 feet, use 10 AWG; over 100 feet, use 8 AWG.
A 2-volt drop on an 8-ohm speaker driven by a 100-watt amplifier costs roughly 6 watts of usable power, a noticeable reduction in volume and clarity.
Cheap speaker wire with thin conductors and poor insulation adds resistance that compounds over distance.
Shielded Cable and Interference Prevention
Shielded speaker wire uses a conductive mesh or foil layer to block electromagnetic interference.
When running speaker wire parallel to power lines, dimmer switches, or fluorescent fixtures, shielded cable prevents hum and noise from coupling into the audio signal.
Metal conduit acts as a Faraday cage that can attenuate high-frequency signals. Use non-metallic conduit for speaker wire, or maintain adequate spacing within metal conduit.
Surround Sound Speaker Wiring Installation
Surround sound systems create immersive audio by distributing speakers around the listening space. Proper wiring for 5.1 and 7.1 configurations requires planning cable routes before installation begins.
5.1 and 7.1 Channel Configuration
A 5.1 system uses five speakers (left front, center, right front, left surround, right surround) plus a subwoofer; a 7.1 system adds left rear and right surround channels. Each speaker requires its own wire run from the amplifier or receiver.
Plan speaker placement first, then route cables. Surround speakers typically mount on side walls 1-2 feet above ear level; rear surrounds mount on rear walls at similar height.
Surround channel routing is harder than front channels because runs are longer and paths less direct.
Running Cables Through Walls and Conduit
Running cables through walls requires planning to avoid electrical wiring, plumbing, and structural elements. Use a stud finder and circuit tracer to identify safe paths before drilling.
Conduit also isolates low voltage cables from interference. When conduit runs parallel to electrical wiring, maintain the NEC-required 2-inch separation or use shielded conduit.
Home Theater Prewiring for New Construction vs. Retrofitting
New construction offers a once-in-a-lifetime chance to install a complete low voltage wiring infrastructure before drywall closes walls. Retrofitting demands creative routing and often compromises ideal cable paths.
Planning a Home Run Wiring System
A home run wiring system centralizes all low voltage cables in one location, typically a media closet, equipment rack, or central junction box.
In new construction, run conduit from the central equipment location to each wall plate during framing, before drywall.
Plan for growth: run extra empty conduit to likely expansion points (bedrooms, patios, outdoor spaces) even if you don't populate them immediately. Installing extra conduit during construction is negligible compared to retrofitting later.
Retrofitting Existing Homes
Retrofitting requires routing cables through existing wall cavities, attics, and crawl spaces. Surface-mounted conduit along baseboards or crown molding is often most practical.
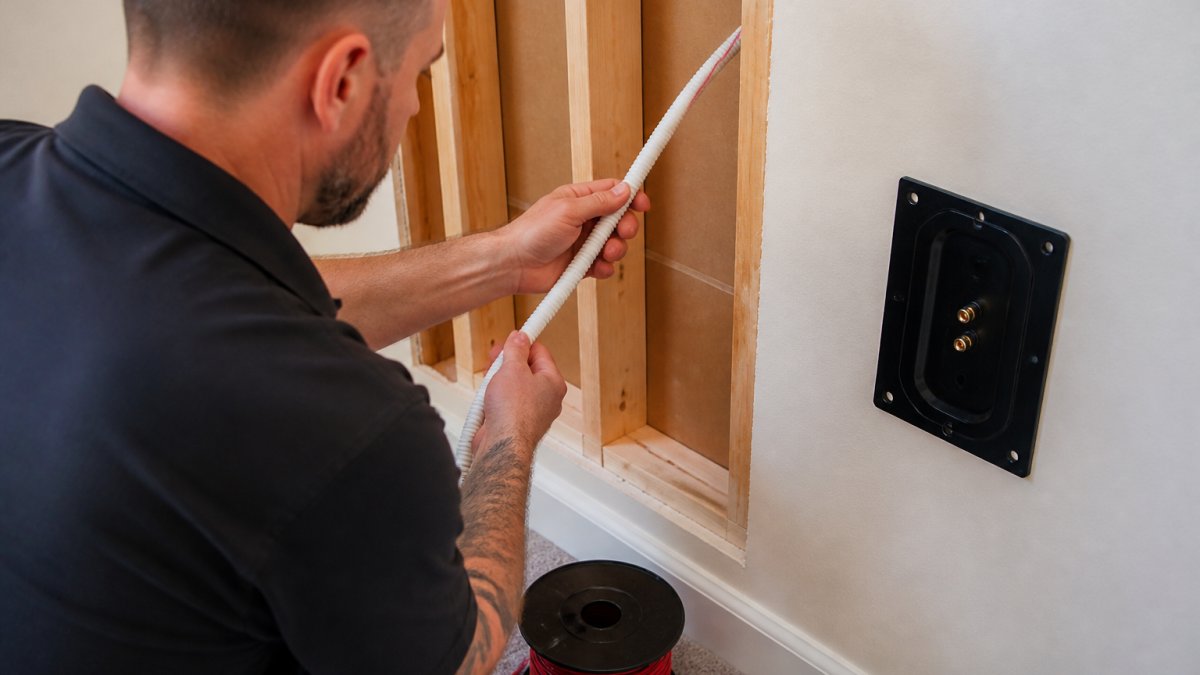
For in-wall retrofits, use a flexible fish tape or wire puller to thread cables through existing wall cavities.
Attic and crawl space routing works well for horizontal runs and offers easier future access. Use cable trays or conduit to organize and protect cables.
Installation Essentials: Mounting Brackets, Wall Plates, and Cable Management
Final installation quality depends on proper mounting, termination, and cable management. Sloppy work here undermines the cabling infrastructure you've installed.
Old Work Boxes and Gang Boxes
Wall plates mount to electrical boxes in wall cavities.
Select wall plates matching your cable types. A typical home theater plate might include HDMI, ethernet, speaker wire terminals, and coax connectors. Keystones (modular connectors) let you customize configurations, but HDMI, Cat6, and coax keystones are not interchangeable.
Terminate cables carefully: strip only as much insulation as needed, twist stranded conductors firmly, and secure connections. Loose terminations introduce resistance and signal loss.
Termination and Wall Plate Installation
Proper termination begins with the right tools: a wire stripper, crimper, and punch-down tool appropriate for your cable types.
Install wall plates flush with the wall and secure them firmly to the electrical box. Ensure the plate is level and square; a crooked plate looks unprofessional and makes connector insertion difficult.
Cable management behind the wall plate matters as much as the plate itself. Bundle cables neatly, secure with velcro straps or cable clips, and avoid sharp bends.
Future-Proofing: 8K, Bandwidth, and Smart Home Integration
Today's installation decisions determine whether your infrastructure remains relevant for the next decade or becomes obsolete within five years. Future-proofing means anticipating where the industry is heading.
Planning for Higher Bandwidth Standards
8K video requires significantly higher bandwidth than 4K. An 8K signal at 60Hz with 10-bit color depth demands roughly 48 Gbps.
For future-proofing, run fiber optic cables alongside copper in your conduit infrastructure. Fiber carries video over much longer distances without signal loss and is immune to electromagnetic interference.
Ethernet-based video distribution (IP video) is increasingly common commercially and entering residential markets. Systems like Dante for audio and IPTV for video distribute content over standard ethernet.
Integrating Smart Home Systems
Modern home theater systems integrate with smart home platforms (Amazon Alexa, Google Home, Apple HomeKit) for voice control, automation, and centralized management.
Smart lighting, motorized window treatments, HVAC controls, and security systems all benefit from centralized low voltage wiring. Run extra ethernet drops to bedrooms, bathrooms, kitchens, and outdoor spaces where smart devices might eventually live.
At Integrity Home Technologies, we've found that homes prewired for smart home integration see significantly higher adoption rates and user satisfaction.
Step-by-Step Low Voltage Wiring Installation Process
A methodical installation process minimizes mistakes, ensures code compliance, and produces reliable results for years.
Planning Your Layout and Route
Document your home theater layout on a floor plan, marking speaker locations, equipment closet position, wall plate locations, and cable routes.
Create a cable inventory listing every run's type (speaker wire gauge, Cat6, HDMI, coax), length, and destination. This guides material purchasing and simplifies troubleshooting.
Obtain any required permits and schedule inspections. Most low voltage wiring doesn't require inspection, but some jurisdictions regulate in-wall cable runs. Confirm requirements with your local building department before starting.
Running and Securing Cables
Run cables in the order that makes physical sense: ethernet and coax first (more rigid), then speaker wire (more flexible), then HDMI last (most delicate).
Secure cables at regular intervals with cable clips or velcro straps. Avoid staples, which puncture insulation, and never use electrical tape as a permanent fastener.
At wall plate locations, leave 6-12 inches of slack for termination and future modifications. Coil excess cable neatly in the wall cavity or equipment closet.
Testing and Troubleshooting Signal Issues
After installation, test every cable run before terminating connections.
Common issues include intermittent connections (loose terminations), signal loss (undersized gauge or excessive length), and interference (cables parallel to power lines without separation).
If problems persist, suspect external interference. Move cables away from fluorescent lighting, dimmer switches, and microwave ovens.
Document your installation with photographs and a cable map. This simplifies future troubleshooting and helps any technician understand your system's architecture.
Frequently Asked Questions
What gauge of wire should I use for home theater speakers?
Speaker wire gauge depends on distance and amplifier power. For runs under 50 feet, 14 AWG wire works for most systems. Longer distances or higher-powered amplifiers require 12 AWG or thicker. Use low-voltage wire rated for audio applications with proper insulation. Thicker gauge reduces voltage drop and maintains signal quality, especially critical for surround sound channels positioned farther from the amplifier.
Can I use low-voltage wire for speakers?
Yes, but with conditions. Low-voltage speaker wire must be specifically rated for audio applications and have adequate gauge for your distance and power requirements. Standard low-voltage wire (like Cat5 or Cat6) is not suitable for speakers because it lacks the proper insulation and impedance characteristics. Always use speaker wire or audio-rated low-voltage cable designed for surround sound systems to avoid signal degradation and interference.
How far can I run speaker wire without losing sound quality?
Sound quality remains acceptable up to 50 feet with proper 14 AWG wire. Beyond 50 feet, voltage drop increases and signal degrades noticeably. For distances over 50 feet, use 12 AWG or 10 AWG wire to maintain audio clarity. Shielded cable helps prevent interference over longer runs. When planning a home run wiring system, account for actual cable path length, not just straight-line distance, and choose gauge accordingly.
What's the difference between home theater prewiring and retrofitting?
Home theater prewiring installs cables during new construction or major renovation before walls are closed, allowing cables to run through studs and conduit cleanly. Retrofitting adds wiring to existing finished walls using in-wall rated cable, conduit, and old work boxes, which is more labor-intensive and visible. Prewiring is cleaner and allows for future upgrades; retrofitting works when prewiring wasn't done but requires careful routing to avoid damage.
Do I need shielded cable for home theater wiring?
Shielded cable is recommended for runs near electrical wiring, HVAC systems, or wireless equipment to prevent signal interference. Standard speaker wire works fine in clean installations, but shielded cable provides extra protection against noise and signal degradation, especially for longer runs or 7.1 surround sound systems. The cost difference is minimal compared to the potential audio quality benefit.
What electrical codes apply to low voltage wiring installation?
Low voltage wiring must comply with the National Electrical Code (NEC), which specifies separation distances from line voltage wiring, proper conduit sizing, and non-metallic sheathing requirements. Different states and municipalities may have additional requirements. Always check local building codes before installation. Professional installers ensure compliance with current electrical code standards to keep your system safe and insurable.