 How-to
Improve Home Wi-Fi Signal in Basement Office
Table of Contents
- Why Basement Offices Struggle With Wi-Fi Coverage
- Diagnose Your Basement Wi-Fi Problem
- Choose Your Fix: A Decision Tree for Basement Wi-Fi
- Solution 1: Reposition Your Router for Better Coverage
- Solution 2: Add a Wi-Fi Extender for Concrete Walls
- Solution 3: Deploy a Mesh Network With Nodes Placed Strategically
- Solution 4: Run an Ethernet Connection for Basement Office Reliability
- Verify Your Improvement and Maintain Stable Performance
- Frequently Asked Questions
Last Updated: October 11, 2026
Why Basement Offices Struggle With Wi-Fi Coverage
Basement offices struggle with wireless connectivity because concrete walls, floor joists, and earth absorb Wi-Fi signals far more effectively than drywall, making it essential to improve home Wi-Fi signal basement spaces. Most home routers sit on the first floor, leaving basements 30-40 feet away with multiple structural barriers in between.
The result is dropped connections, slow speeds, and dead zones that kill productivity, video calls freeze, file uploads stall.
Several proven solutions exist, and the right choice depends on your home layout, budget, and installation tolerance.
Diagnose Your Basement Wi-Fi Problem
A proper diagnosis saves time and money by identifying the specific obstructions blocking your signal.
How to Test Wi-Fi Signal Strength in Your Basement
On Windows:
- Right-click the Wi-Fi icon in your system tray
- Select "Open Network & Internet settings"
- Click "Advanced network options"
- Look for "Signal strength" listed as a percentage
On Mac:
- Hold Option and click the Wi-Fi icon in the menu bar
- Note the RSSI number (Received Signal Strength Indicator)
- A stronger signal shows a number closer to 0
On smartphone:
- iPhone: Settings → Wi-Fi → tap your network name → look at signal bars
- Android: Settings → Network & Internet → Wi-Fi → tap network name → signal strength
Signal strength above −67 dBm is good; −67 to −70 dBm is acceptable for browsing and email; −70 to −80 dBm causes slowdowns and dropped calls; below −80 dBm makes work nearly impossible. Test from your actual workspace at different times of day, as interference from cordless phones, microwaves, and neighboring networks fluctuates.
Identify Basement-Specific Obstructions
Wi-Fi travels in straight lines until it hits an obstacle. Basements present obstructions that upstairs rooms rarely do. Understanding which ones block your signal helps you choose the right solution.
Concrete and masonry walls are the primary culprit, causing 20-30 dB of loss compared to drywall, making a basement 30 feet away feel farther than an upstairs room 50 feet away.
Floor construction between router and basement adds 10-15 dB of loss. Spray foam insulation absorbs more signal than fiberglass. If your basement is directly below the main floor, you're fighting both horizontal distance and vertical floor loss.
Metal ductwork and pipes scatter Wi-Fi signals. A direct line of sight between router and workspace performs better than a path blocked by metal.
Use a Wi-Fi analyzer app to map the problem. WiFi Analyzer (Android), iStumbler, or NetSpot show real-time signal strength as you move. A sharp drop-off points to a major obstruction; gradual decline suggests distance is the primary issue.
Estimate Distance and Obstruction Severity
Estimate distance from router to basement office. Under 40 feet with few obstructions: router repositioning may work. 40-60 feet with moderate obstructions: an extender or mesh node can help. Over 60 feet or heavily obstructed: mesh with wired backhaul or Ethernet is necessary.
Choose Your Fix: A Decision Tree for Basement Wi-Fi
Four main solutions exist to improve home Wi-Fi signal basement coverage. Your home layout, budget, tolerance for installation work, and work requirements determine which fits best. This section walks you through the trade-offs so you can choose confidently.
Solution Selection by Distance and Obstruction
Under 40 feet with few walls: Try repositioning the router first. 40-60 feet with moderate obstructions: A Wi-Fi extender ($30-80) works for email and browsing but causes 30-50% speed reduction. A mesh node ($100-200) delivers better speed. Over 60 feet or heavily obstructed: Mesh with wired backhaul ($200-400) or Ethernet ($50-150) is necessary.
Solution Selection by Work Requirements
Your basement office work determines which solution is acceptable.
Light work (email, browsing, occasional video calls): An extender or mesh node works; aim for −70 dBm or better. Video conferencing and VPN: Wired mesh or Ethernet eliminates freezing from interference. Large file transfers or streaming: Mesh with wired backhaul or Ethernet is necessary for sustained 25+ Mbps. Multiple devices: Wired Ethernet to a network switch lets devices connect at full speed.
Solution Selection by Installation Effort and Budget
Router repositioning: $0, 15 min, 40-50% success. Wi-Fi extender: $30-80, 30 min, 70-80% success, 30-50% speed reduction. Mesh network: $150-400, 45 min-3 hours, 85-95% success. Ethernet: $50-150, 2-4 hours, 100% success, no wireless interference.
Quick Decision Framework
Answer these three questions:
-
How far is your basement office from the router?
- Under 40 feet → Start with repositioning
- 40-60 feet → Extender or mesh node
- Over 60 feet → Mesh with wired backhaul or Ethernet
-
What's your tolerance for installation work?
- None → Extender
- Some → Mesh with wireless backhaul
- Willing to run cable → Mesh with wired backhaul or Ethernet
-
What's your primary work need?
- Browsing and email → Extender is fine
- Video calls and VPN → Mesh or Ethernet
- Large uploads or streaming → Ethernet or mesh with wired backhaul
The intersection of these answers points to your best solution. Most basement offices benefit from either a mesh node placed on the basement stairs with an Ethernet cable run from the main router (best balance of performance and effort) or a full Ethernet run to the office (most reliable, highest effort).
Solution 1: Reposition Your Router for Better Coverage
The first step costs nothing and solves many basement Wi-Fi problems. Your router's location determines how far the signal travels and which directions it reaches.
Move your router to a central, elevated location. If it sits in a corner of your main floor or inside a closet, move it to an open area near the center of your home.
Avoid placing the router inside cabinets, behind doors, or near metal objects. Metal reflects Wi-Fi signals. So does water, keep the router away from aquariums and water heaters.
Point the antennas in different directions if your router has multiple antennas. One vertical, one horizontal, one at an angle. This helps the signal reach more areas.
Test your basement signal again after moving the router. If you see improvement, you've solved it without spending money. If signal strength is still below -75 dBm in your basement office, move to the next solution.
Solution 2: Add a Wi-Fi Extender for Concrete Walls
A Wi-Fi extender picks up your existing signal and rebroadcasts it to reach farther. It's the cheapest paid option and requires no wiring.
How it works: The extender sits between your router and the basement, catching the signal and amplifying it. You connect your devices to the extender's network instead of the main router.
The trade-off is speed. An extender uses part of its bandwidth to communicate with the router and part to serve your devices. You typically see a 30-50% speed reduction compared to connecting directly to the router.
For basement office work involving email, browsing, and video calls, this is often acceptable. For large file transfers or streaming, it's noticeable.
Placement is critical for extenders. Place it halfway between your router and basement office, in an open area with good signal from the main router.
Extenders work best in homes where the basement office is 40-60 feet from the router with moderate obstructions. Beyond that range, a mesh network performs better.
Solution 3: Deploy a Mesh Network With Nodes Placed Strategically
A mesh Wi-Fi system replaces your single router with multiple nodes that work together. Each node communicates with the others, creating a seamless network across your entire home.
Mesh networks maintain better speeds than extenders because they use dedicated wireless channels for backhaul (communication between nodes). You get stronger, more stable coverage without the speed penalty.
Setup is straightforward. Replace your main router with a mesh system's primary node. Place additional nodes in key locations, one on the basement stairs or in a nearby room, for example. Use the system's app to connect and configure them.
The nodes communicate wirelessly by default, but many mesh systems support wired backhaul. If you can run an Ethernet cable from your main router to a basement node, the node uses that wired connection instead of wireless.
Mesh systems cost more than extenders but deliver noticeably better performance. They're ideal for homes where basement offices need reliable, fast connections and you want seamless coverage throughout the house.
Solution 4: Run an Ethernet Connection for Basement Office Reliability
Ethernet cable delivers the fastest, most stable connection possible. If your basement office is your primary work location, this is the most reliable solution.
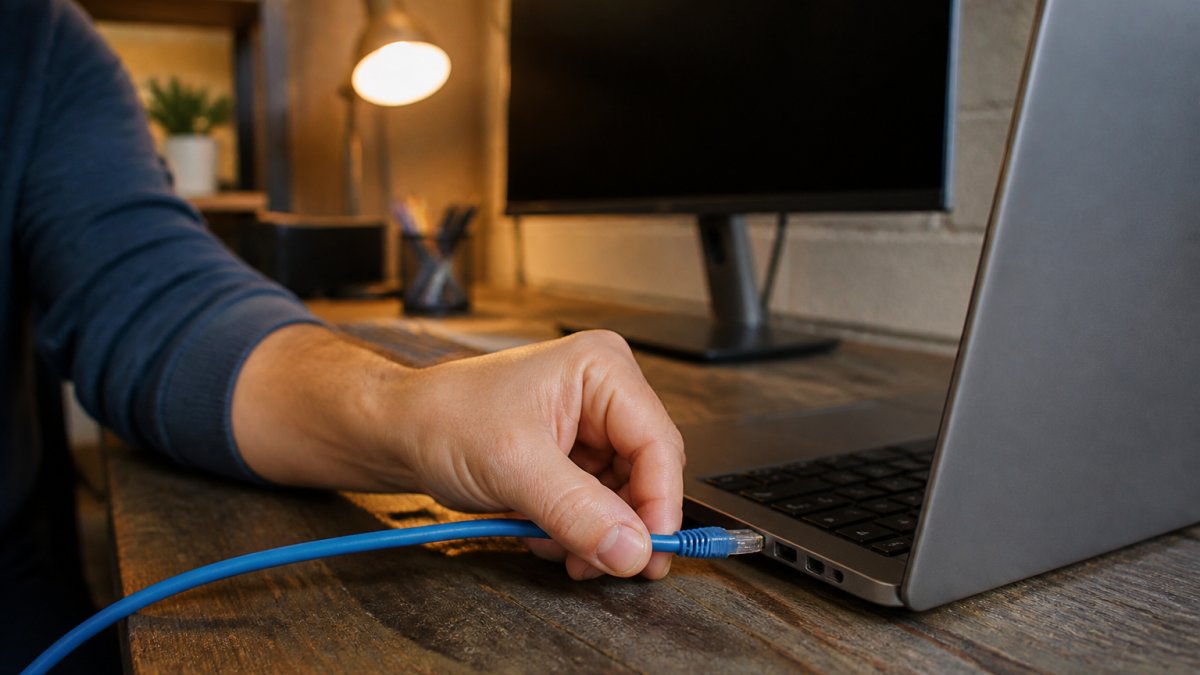
How to run the cable: Start at your router. Run a gigabit Ethernet cable along walls, baseboards, or through existing conduit to your basement office. Use cable clips to secure it neatly.
The cable needs to reach from your router to a device in the basement, or to a network switch if multiple devices need connections.
Advantages: No wireless interference. No speed loss. Latency is minimal. Video calls work perfectly. Large file transfers are fast.
Disadvantages: Installation takes effort. The cable must be routed carefully to avoid creating a tripping hazard. You're tethered to one location unless you use a wireless access point at the other end.
Many homes have existing low-voltage conduit or crawl spaces that make running cable easier. If your basement has a drop ceiling, you can run cable above the tiles.
Verify Your Improvement and Maintain Stable Performance
After implementing your chosen solution, test again. Your signal strength should improve noticeably.
Compare the results to your initial test. You should see signal strength closer to -67 dBm or better.
If results still disappoint:
Check that your devices are connected to the correct network. New mesh nodes and extenders create their own network names.
Verify that interference isn't the culprit. Cordless phones, baby monitors, and microwave ovens all broadcast on the 2.4 GHz frequency that Wi-Fi uses.
Restart your router and any new equipment. Power cycle everything and reconnect. This clears temporary glitches.
Maintain what you've built:
Update router and mesh node firmware regularly. Manufacturers release updates that improve performance and security. Check the admin app or web interface monthly.
Monitor your signal strength quarterly.
Keep cables and equipment away from heat sources and water. Avoid coiling Ethernet cables tightly, as this can damage the wires inside.
Integrity Home Technologies can help with professional installation if running Ethernet or setting up mesh nodes feels overwhelming.
Frequently Asked Questions
Why isn't my Wi-Fi working properly in the basement?
Basement Wi-Fi struggles because concrete walls, floors, and structural elements absorb and block radio signals. The distance from your router, combined with these physical obstructions, causes severe signal loss. Basement offices are typically below grade, which adds another layer of interference. Metal pipes, HVAC ducts, and electrical wiring also degrade wireless coverage. Testing your signal strength will reveal whether you have a weak connection or near-complete dead zones.
How can I test Wi-Fi signal strength in my basement?
Use your smartphone or laptop's built-in Wi-Fi settings to check signal bars, or download a free app like Wi-Fi Analyzer or NetSpot to measure decibels (dBm). Stand in your basement office and note the reading. Readings above -67 dBm are strong; between -67 and -70 dBm are acceptable; below -80 dBm indicate poor coverage. Compare readings at different spots in the basement to map dead zones. Test again after implementing a fix to verify improvement.
Should I use a mesh Wi-Fi system or an extender for my basement office?
Mesh systems work better for whole-home coverage and concrete walls because nodes communicate via wired backhaul or strong wireless links. Extenders are cheaper but repeat signals, which can reduce speed by 50%. For basement offices with heavy concrete, a mesh system with a node placed strategically between your main router and basement delivers more stable throughput. Extenders suit smaller gaps or temporary solutions. If you need reliable work connectivity, mesh or wired Ethernet outperforms extenders.
Is running an Ethernet cable to my basement office worth the effort?
Yes. Ethernet provides the fastest, most stable connection for a basement office and eliminates Wi-Fi dead zones entirely. You'll get full gigabit speeds and zero latency issues. Running cable through walls, ceilings, or conduit requires planning, but it's a permanent fix. If your basement office is a permanent workspace where video calls, uploads, or streaming matter, Ethernet is worth the installation. For occasional use, a mesh node or extender may suffice.
Basement Wi-Fi challenges are solvable. The right approach depends on your specific situation, distance from the router, obstructions, and how much installation work you're willing to do. Start with diagnosis, then choose the solution that matches your needs. Integrity Home Technologies offers a free estimate to assess your basement office and recommend the fastest, most reliable path forward. Get started with a consultation and transform your basement into a productive, connected workspace.