 How-to
How to Prevent Outdoor Deck Lighting Corrosion
Last Updated: November 1, 2026
Quick Summary
Preventing deck lighting corrosion starts with keeping water out of the connections, since moisture entering at wire splices, sockets and cable entry points causes most failures. Choose wet-rated fixtures with stainless or coated fasteners, seal every splice with weatherproof connectors, and place fixtures under covers where possible.
- Look for a wet-location listing and an IP65 or higher water rating for exposed fixtures.
- Use 316 stainless steel fasteners near salt air and stainless or galvanized hardware against treated wood.
- Seal wire connections with silicone-filled connectors and apply dielectric grease to socket contacts.
- Mount weatherproof boxes with openings facing down or sideways, and use drip loops on cable.
- Inspect connections and sockets twice a year, and rinse fixtures gently with a hose on low pressure.
Table of Contents
- Why Outdoor Deck Lighting Corrodes and Where It Starts
- Choosing Weather-Rated Fixtures and Corrosion-Resistant Materials
- Step 1: Plan Fixture Placement Under Covers and Overhangs
- Step 2: Protect Outdoor Lighting Connections from Moisture
- Step 3: Install Weatherproof Electrical Boxes and Seal Entry Points
- Diagnosing Corrosion by Location and Symptom
- Outdoor Deck Lighting Maintenance Schedule and Safe Cleaning
- Scheduling Your Deck Lighting Protection Review
- Frequently Asked Questions
Why Outdoor Deck Lighting Corrodes and Where It Starts
Corrosion is the quiet killer of outdoor deck lights. Most deck lighting failures trace back to the same few weak points.
Corrosion is the gradual breakdown of metal caused by moisture and oxygen. On a deck, that moisture comes from rain, dew, sprinkler overspray, and humidity under the boards.
Water rarely attacks the fixture housing first. It usually finds the path of least resistance:
- Gaps where the fixture meets the mounting surface
- Wire nuts and splices left exposed or poorly sealed
- Bulb sockets that trap condensation
A common mistake is assuming a light is "waterproof" because it sits outdoors.
Choosing Weather-Rated Fixtures and Corrosion-Resistant Materials
Start with the rating, not the price tag. Look for a wet- or damp-location listing and a clear ingress protection (IP) rating. Wet-location fixtures handle direct rain; damp-location fixtures suit covered spots like a roof overhang. A fixture marked only "outdoor" is usually a damp-location product at best.
Reading the rating before you buy
- Wet location: rated for direct rain, sprinkler overspray, and washdown. Use this anywhere the fixture is not under a roof.
- Damp location: rated for covered, humid spots such as under a pergola roof or a soffit.
- IP rating: the first digit is solids (dust), the second is water. For deck lighting, an IP65 or higher water rating is the practical floor for exposed fixtures; IP44 is common on damp-location units and should stay under cover.
Material compatibility and galvanic corrosion
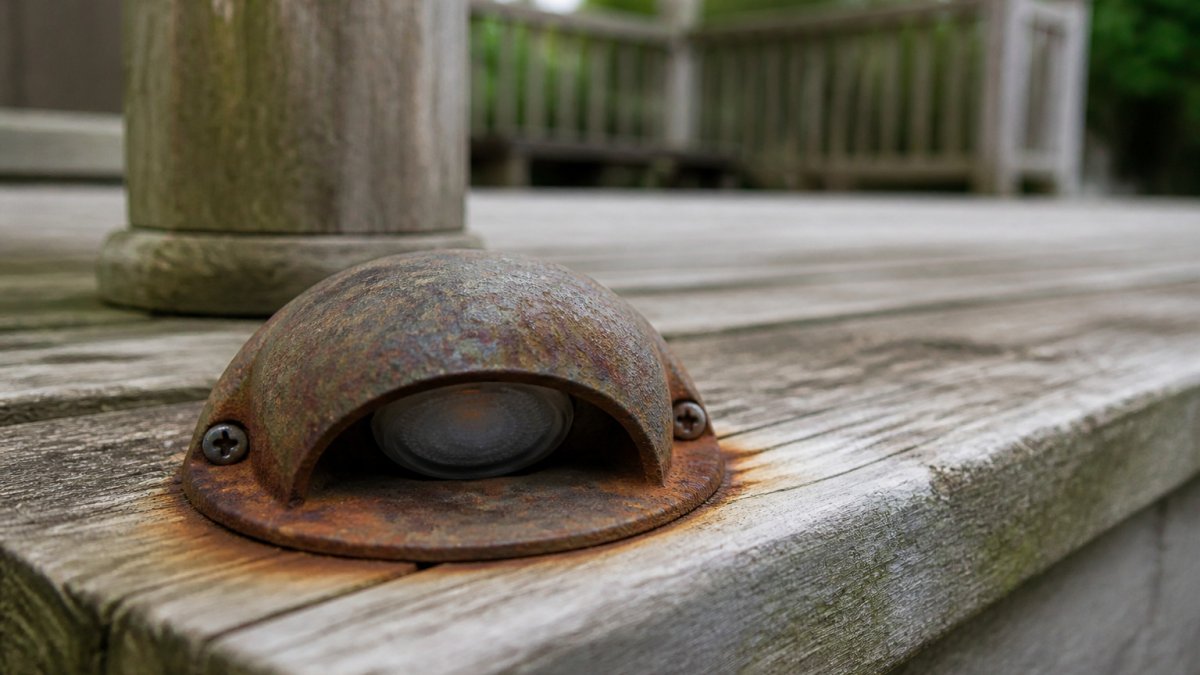
This is the part most guides skip. When two different metals touch in the presence of moisture, the more active metal corrodes faster, that is galvanic corrosion. Classic deck pairings: stainless screws into aluminum bodies, galvanized brackets against stainless rails, copper wire on aluminum terminals. The result is pitting, white or green crust, and fasteners that seize or snap.
A few rules keep dissimilar metals from eating each other:
- Match the fastener to the fixture body where you can. Stainless fasteners in stainless bodies, coated or aluminum fasteners in aluminum bodies.
- Isolate when you cannot match. A nylon washer or a dab of anti-seize compound between dissimilar metals breaks the electrical path that drives galvanic corrosion.
- Keep copper and aluminum apart. Use connectors listed for copper-to-aluminum transitions rather than twisting the two together.
- Watch treated wood. Modern pressure-treated lumber uses copper-based preservatives that are corrosive to bare steel and zinc. Use stainless or hot-dip galvanized hardware anywhere it contacts treated boards, and keep bare aluminum from sitting directly on wet treated wood.
- Coastal and salt-air decks accelerate every one of these reactions. In salt air, 316 stainless is the baseline for exposed hardware, and sacrificial anodes on larger metal components are worth considering.
| Material | Corrosion Resistance | Best Use |
|---|---|---|
| 316 stainless steel | Excellent, including near salt air | Exposed rails, fasteners, coastal decks |
| 304 stainless steel | Very good in most climates | General fixture bodies and inland hardware |
| Powder-coated aluminum | Good when coating stays intact | Fixture housings away from salt air |
| Durable UV-stable plastic | Good, will not rust | Light shields, covers, lens frames |
| Hot-dip galvanized steel | Good until the zinc layer wears | Structural brackets, not visible trim |
| Untreated or electroplated steel | Poor | Avoid outdoors entirely |
Step 1: Plan Fixture Placement Under Covers and Overhangs
Placement can cut moisture exposure more than any product upgrade. Fixtures under a deck's edge, a pergola roof, or a covered patio get far less direct rain.
Estimated time: 30 to 45 minutes to walk the deck and mark positions.
Follow these steps:
- Walk the deck at dusk and after a rain to see where water pools or runs.
- Mark spots under overhangs first, since they stay drier.
- Keep fixtures at least a few inches away from downspouts and sprinkler heads.
- Angle fixtures slightly downward so water runs off instead of collecting.
- Plan cable routes that avoid low spots where standing water sits.
Watch out: Mounting a fixture directly under a gutter outlet can send a steady stream of water onto the housing every time it rains.
Step 2: Protect Outdoor Lighting Connections from Moisture
Connections are where most deck lighting corrosion begins. A wet bare copper splice oxidizes, then the connection heats up, resists current, and fails. Protecting outdoor lighting connections from moisture is the step homeowners skip most often.
Estimated time: 15 to 20 minutes per fixture.
Using Silicone-Filled and Weatherproof Connectors
Use connectors rated for direct burial or wet locations. Silicone-filled connectors seal each wire from outside air. Snap them on, make sure the wire is fully seated, and skip bare wire nuts left open to the weather.
Follow these steps:
- Strip the wire ends just enough to seat them fully in the connector.
- Insert each wire until it stops inside the connector.
- Press or crimp the connector firmly, following the manufacturer's instructions.
- Give each connection a gentle tug to confirm it holds.
- Keep connectors off the ground, ideally tucked into a box or under a rail.
Applying Dielectric Grease to Electrical Contacts
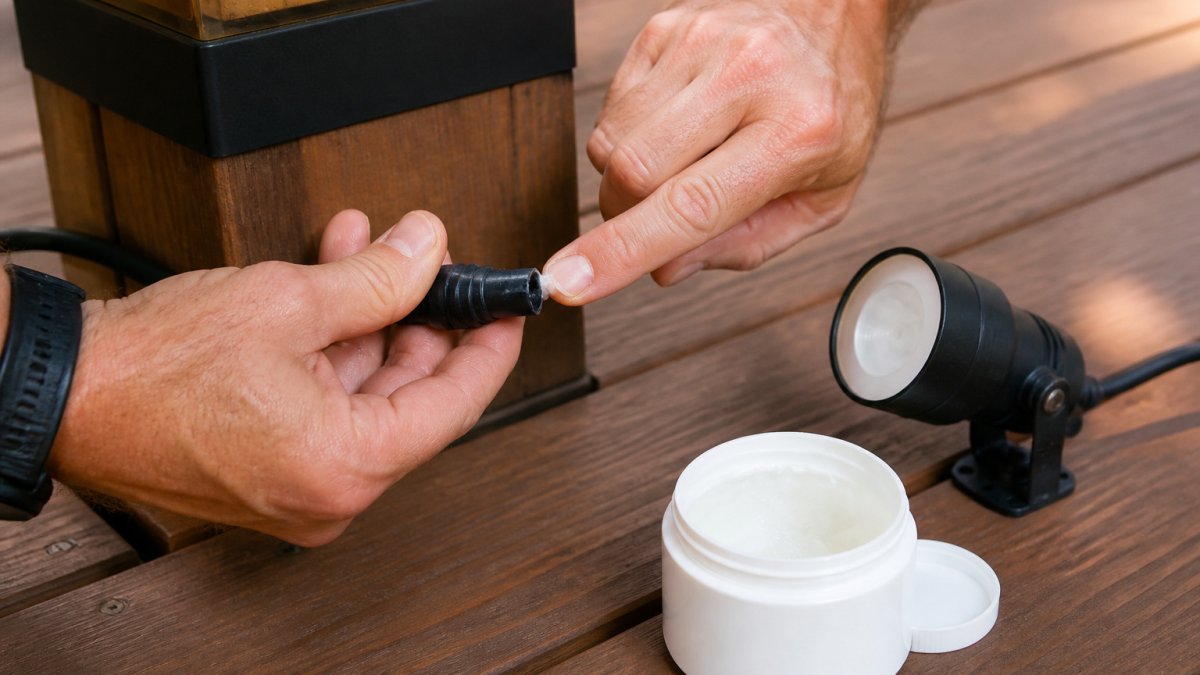
Dielectric grease is a non-conductive grease that blocks moisture and air from metal contacts. Apply a thin coat to bulb socket contacts and plug connections before reassembling. Too much can ooze into the electrical path and interfere with contact.
Pro tip: Apply dielectric grease to the socket threads and contacts as well as the connector pins. Most socket failures start with condensation sitting on bare metal.
Step 3: Install Weatherproof Electrical Boxes and Seal Entry Points
Every point where a cable enters a box or fixture is a potential leak. Use weatherproof boxes with gasketed covers and mount them above the deck surface where possible.
Estimated time: 45 to 60 minutes for a typical run of fixtures.
- Choose a box rated for outdoor or wet locations.
- Mount the box so the opening faces down or sideways, not up.
- Use weatherproof cable glands or strain reliefs at every entry point.
- Seal around the cable with a flexible outdoor-rated sealant.
- Check that the cover gasket sits flat and fully compressed before tightening.
Watch out: Drilling a hole in a box after mounting it can leave metal shavings and a rough edge that damages the gasket. Drill first, then mount.
Diagnosing Corrosion by Location and Symptom
Once you know where to look, corrosion is easier to spot. Each symptom points to a different cause.
- Green or white crust on wire connections: Moisture has reached the copper. Replace the connector and seal it properly.
- Flickering or dim light: Often a bad connection or a socket with condensation. Check the splice first.
- Rust streaks below screws: Untreated fasteners are failing. Replace them with stainless steel.
Many people find that corrosion on the fixture itself is a late symptom. The early warning sign is almost always at the wire connections.
Outdoor Deck Lighting Maintenance Schedule and Safe Cleaning
Corrosion prevention is ongoing, and on a deck it is mostly about managing where water goes. A simple schedule plus a few deck-specific habits catches problems early.
Deck-specific water management
Fix the water paths first. These details matter more on a deck than on a wall because boards, rails, and joists create traps and drip points.
- Drip loops: route cable so it dips below the fixture entry point before rising into it. Water runs to the low point and drips off instead of tracking into the housing.
- Mounting orientation: face box openings and fixture weep holes down or sideways, never up. A fixture with a weep hole pointed up is a cup.
- Avoid water traps: keep cable out of the channel where deck boards meet the rim joist, and off the top of joists where debris collects.
Maintenance schedule
- Monthly: Check lights for dim spots, flickering, or condensation inside lenses. Look for new rust streaks below fasteners.
- Every 3 months: Wipe fixtures, check cover gaskets, and clear debris from under the deck and around fixture bases.
- Twice a year (spring and fall): Inspect every connector, socket, and box seal. Reapply dielectric grease where needed. Re-torque fasteners and replace any that show rust.
Safe cleaning steps
- Turn off power at the breaker or transformer before touching any fixture.
- Rinse the fixture with a garden hose on a gentle setting. Avoid direct high-pressure spray at seals.
- Wipe the housing with a soft cloth and mild soap. Rinse well.
- Dry the fixture and cover with a clean cloth.
- Never use abrasive pads, steel wool, or harsh chemicals that strip the protective coating.
Cleaning contacts without damaging coatings
When you open a connection or socket, clean the metal, not the plating. A pencil eraser or plastic-bristle brush lifts light oxidation; an electronics-safe contact cleaner removes residue. Avoid sandpaper and wire brushes on plated terminals, they strip the plating and leave bare metal that corrodes faster. Dry completely and reapply a thin coat of dielectric grease before reassembling.
When to repair and when to replace
- Repair: light oxidation on terminals, a loose connector, a worn gasket, or rusted fasteners. These are low-cost fixes.
- Replace: a cracked housing, water inside a sealed lens, a socket that is pitted or heat-discolored, or a fixture whose coating is failing across the body. Once corrosion reaches the housing or socket, repairs rarely last.
Scheduling Your Deck Lighting Protection Review
Preventing outdoor deck lighting corrosion is easier with a professional look at your current setup. Integrity Home Technologies can review your current setup and discuss what needs attention.
Request a Get a Free Estimate to discuss your project. If your deck lighting is due for a fresh installation with proper weather protection, you can also learn more about outdoor lighting design and installation and our approach to choosing weather-rated fixtures.
Frequently Asked Questions
How do you prevent corrosion on outdoor deck lights?
Start with fixtures rated for wet or damp locations and made from stainless steel or durable plastics. Keep fixtures under covered areas or overhangs where possible, seal connections against water with weatherproof connectors, and apply dielectric grease to electrical contacts before assembly. Rinse debris and salt residue off fixtures periodically with a soft cloth and mild soap, then inspect for early signs of corrosion each season so small issues do not spread to wiring.
Can you use dielectric grease on outdoor lighting connections?
Yes. Dielectric grease is a non-conductive compound that keeps moisture and air away from metal contacts without interfering with the electrical connection itself. Apply a thin coat to the contacts and bulb bases before mating connectors, and do not use so much that it squeezes out and attracts dirt. Reapply when you reseal a connection during maintenance, especially after a fixture has been disconnected or cleaned.
How often should outdoor deck lights be inspected?
Inspect deck lighting at least twice a year, once in spring after the wettest months and once in fall before winter moisture and freezing temperatures arrive. Check fixture housings for cracks, look for white or green residue on connectors, confirm light shields are intact, and test that each circuit works. Coastal or salt-exposed decks benefit from a quick rinse and inspection after heavy storms or seasonal salt exposure.
Why do outdoor light fixtures corrode?
Corrosion develops when moisture, oxygen and metal combine, and it accelerates when dissimilar metals touch in the presence of water. Water often enters through loose seals, cracked housings or unprotected wire connections, then sits against contacts for months. Using compatible materials, sealing connections and keeping fixtures out of direct spray and standing water slows the process considerably.