 Listicle
Best Outdoor Lighting for Deck Safety in 2026
Table of Contents
- What Makes Outdoor Lighting Work for Deck Safety
- Safety-First Comparison: Fixture Types, Brightness, and Placement
- Deck Stair Lights: The Highest-Priority Safety Upgrade
- Deck Railing Lights: Marking Edges and Transitions
- Low-Voltage Deck Lighting: What a 24V System Delivers
- Solar Deck Lights: Where They Work and Where They Fall Short
- Installation, Electrical Safety, and Long-Term Costs
- Conclusion: Getting Deck Safety Lighting Right
- Frequently Asked Questions
Last Updated: October 9, 2026
What Makes Outdoor Lighting Work for Deck Safety
The best outdoor lighting for deck safety is not the brightest fixture you can buy. It is the right mix of step lights, railing lights, and low-level illumination placed where feet actually land. At Integrity Home Technologies, we have installed low-voltage outdoor lighting for more than 20 years, and decks fail at the transitions, not the open boards.
Deck safety lighting is outdoor illumination positioned to reveal changes in level, edges, and obstacles after dark. Three factors decide whether it works:
- Placement over power. Light belongs on stair treads, deck edges, and railings, not just overhead.
- Glare control. A bright fixture aimed at eye level blinds people more than it helps them.
- Consistency. Even, low-level light beats one harsh floodlight every time.
Below, we compare fixture types, brightness ranges, placement rules, and costs.
U.S. Consumer Product Safety Commission outdoor lighting and electrical safety guidance
Safety-First Comparison: Fixture Types, Brightness, and Placement
Most deck lighting roundups list fixture types and stop there. What actually determines whether a fixture prevents a fall is where it throws light, how bright that light is on the walking surface, its color, and whether it blinds the person using the stairs. Below is a comparison built on those measurable criteria.
The Four Safety Criteria We Use
- Surface illuminance. Does the fixture put usable light on the tread, board, or path where a foot lands? Aim for roughly 5 to 10 foot-candles on stair treads and walking surfaces, enough to read edges and obstacles without washing out contrast.
- Beam spread and cutoff. A narrow beam creates hot spots and dark gaps. A wide, downward-aimed beam with a sharp cutoff keeps light on the surface and out of eyes. Louvered or shielded fixtures are the practical answer.
- Color temperature. Warm white (2700K to 3000K) is the residential standard and preserves night vision better than cool white (4000K and up), which reads as harsh and increases glare perception on reflective decking.
- Glare control. Glare is light aimed at or near eye level. It constricts the pupil and makes the dark areas around a fixture harder to see, the opposite of safety. Shielded, downward-facing fixtures win here every time.
Fixture Comparison by Safety Performance
| Fixture Type | Best Location | Typical Output | Color Temp | Beam Notes | Safety Role |
|---|---|---|---|---|---|
| Step/riser lights | Stair risers, tread edges | 10-50 lumens | 2700-3000K | Downward or louvered, wide spread | Highest priority; lights the landing surface |
| Railing/post lights | Posts, rails, transitions | 20-100 lumens | 2700-3000K | Downward cast, shielded | Marks perimeter and edge |
| Recessed lights | Flush in boards or stairs | 15-60 lumens | 2700-3000K | Wide, flush, no protrusion | Clean look, no trip hazard |
| Wall lights | House wall facing deck | 100-400 lumens | 2700-3000K | Wide ambient, aim down | Ambient fill, not task light |
| Path lights | Walkways to deck | 50-200 lumens | 2700-3000K | Downward, shielded | Guides approach to stairs |
How to Read Lumen Ranges for Safety
Lumens measure total light output, not brightness on a surface. Two fixtures with the same lumens can produce very different results depending on beam angle and mounting height. For safety lighting, the useful question is not "how many lumens" but "how many foot-candles land on the tread."
Practical guidance:
- Stairs: 10 to 50 lumens per fixture, mounted on every riser or every other riser, aimed down and slightly across the tread.
- Edges and railings: 20 to 100 lumens per fixture, spaced so the pools of light overlap rather than leaving gaps.
- Ambient wall lighting: 100 to 400 lumens, aimed down and away from the seating area to avoid glare.
Placement Rules That Prevent Falls
- Light every transition: top of stairs, bottom of stairs, deck-to-yard step, and any ramp or doorway.
- Overlap light pools; dark gaps are where feet catch edges.
- Keep fixtures below eye level and aimed down to avoid glare.
Accessibility and Visibility for Different Users
Safety lighting should work for the people most at risk: older adults, young children, guests unfamiliar with the deck, and anyone with low vision. That means consistent illumination along the entire path, clearly visible stair edges (ideally with contrasting nosing or a continuous light line), no abrupt bright-to-dark transitions, and higher illuminance at stairs than at open deck areas. A deck that is safe for a guest with low vision at night is safe for everyone.
Deck Stair Lights: The Highest-Priority Safety Upgrade
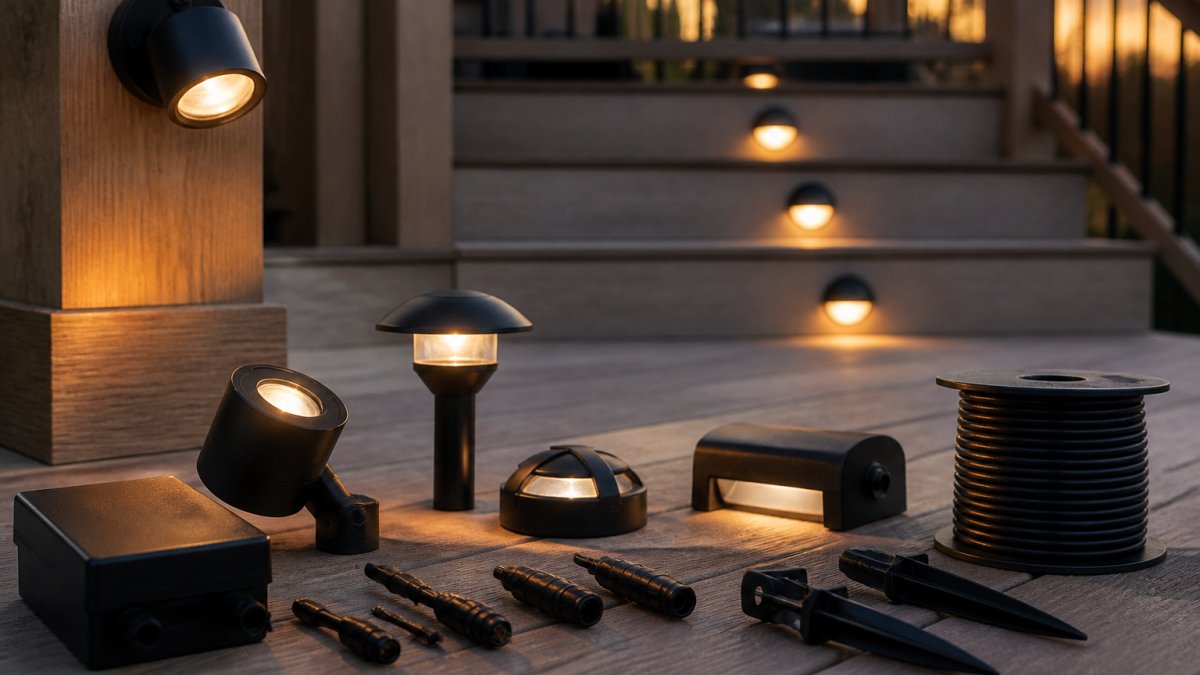
Stairs are where deck injuries happen, so stair lights come first. A stair light (also called a step light or riser light) mounts on the riser or stringer side and washes light across each tread.
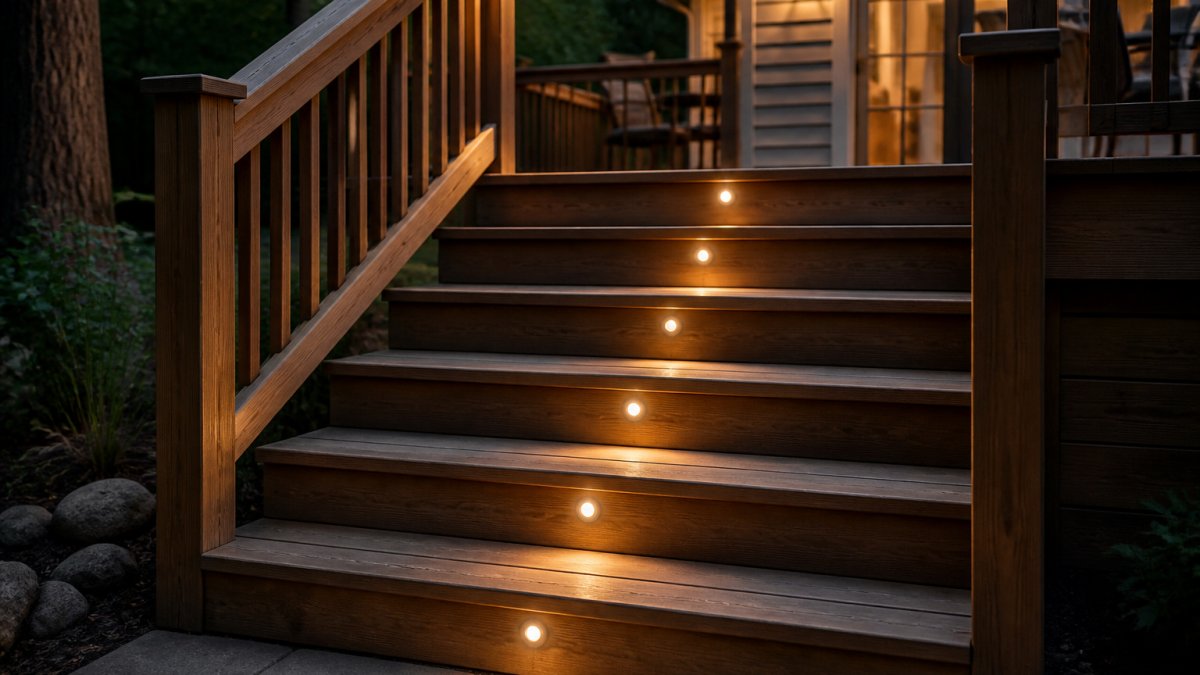
Stair lights fail for two reasons: too few fixtures and the wrong beam angle. Installing one light every third step to save money leaves dark gaps exactly where a foot lands.
- Mount a fixture on every riser, or every other riser at minimum
- Choose downward-facing or louvered designs to cut glare
- Keep output modest, around 10-50 lumens per step
U.S. Department of Energy guidance on LED lighting and energy efficiency
Deck Railing Lights: Marking Edges and Transitions
Railing lights define where the deck ends. Post cap, rail, and baluster lights all draw a visible line along the edge so nobody steps off into the dark, most important at the top of stairs and wherever the deck meets a drop. Post cap lights sit on top of the posts and cast light down onto the rail and deck surface; rail and baluster lights mount lower and light the perimeter more directly.
Low-Voltage Deck Lighting: What a 24V System Delivers
Low-voltage deck lighting runs on a 24V system, the residential standard. A transformer steps household current down to 24 volts, which travels safely through buried or surface-run cable to each fixture. The advantages: safer wiring many homeowners can route themselves in exposed areas, easy mounting, consistent light across a long run when the transformer is sized correctly, and LED fixtures that draw little power and last for years.
Solar Deck Lights: Where They Work and Where They Fall Short
Solar deck lights are the easiest to install and the least reliable for safety. They need no wiring, but on a cloudy stretch a solar fixture may produce only a fraction of its rated brightness, exactly when you need it most. Solar works for path lights along an approach, accent lights on a fence, or a full-sun deck with light evening use.
Installation, Electrical Safety, and Long-Term Costs
Most deck lighting failures trace back to three things: the wrong voltage class for the location, unsealed connections, and undersized transformers. Getting these right separates a system that runs for a decade from one that dies after a season.
Electrical Safety: What the Code Actually Requires
Any 120V circuit feeding a deck, including the receptacle that powers your transformer, must be protected by a GFCI (ground-fault circuit interrupter).
Low-voltage systems have their own rules. The NEC limits Class 2 landscape and deck lighting circuits to 30 volts and 100 volt-amperes per circuit.
Other code points that apply to most decks:
- Use only fixtures, cable, and connectors listed for wet locations.
- Bury direct-burial cable at the depth your local code specifies, or run it in conduit.
- Keep connections above grade where water drains away, not in a low spot.
Call a licensed electrician for any new 120V circuit, any work inside the panel, any bonding or grounding of metal structures, and any time you are unsure whether your local jurisdiction has amended the model code.
Weather, Durability, and Ingress Protection
"Waterproof" on a product page means very little. The useful spec is the IP rating: the first digit for solids (dust), the second for water. For deck fixtures, IP65 is the practical minimum, IP67 is better for anything in standing water or hosed down, and IP68 is overkill for most residential decks. A fixture with no IP rating has no meaningful weather claim.
What It Actually Costs to Own
Upfront cost is only part of the picture. Three ongoing costs matter:
- Energy. LED deck fixtures typically draw 1 to 5 watts each. A 20-fixture system running 6 hours a night uses roughly 1 to 3 kWh per month, a few dollars at typical residential rates. Incandescent or halogen equivalents would use several times that.
- Transformer and controls. Transformers last 5 to 15 years depending on load and heat. Running one at 80% of capacity or less extends its life; running it at 100% shortens it noticeably.
- Fixture replacement. Quality LED fixtures are rated for 30,000 to 50,000 hours, 13 to 22 years at 6 hours a night. Bargain fixtures often fail at the driver or seal long before the LED wears out.
A realistic planning range: a small solar accent setup runs a few hundred dollars; a DIY low-voltage system for a typical deck runs several hundred to over a thousand dollars depending on fixture count and transformer size; professional installation adds labor that scales with run length, trenching, and control complexity. U.S. Department of Energy guidance on LED lighting and energy efficiency
Maintenance Schedule That Prevents Failures
- Monthly: Test the GFCI. Wipe lenses with a damp cloth to clear pollen and dust.
- Seasonally: Inspect every connection for corrosion or water intrusion; reseal as needed. Clear debris from around fixtures and from drainage paths.
- Annually: Check transformer voltage output under load. Test timers, photocells, and smart controls. Tighten mounting hardware, which loosens with freeze-thaw cycles.
Conclusion: Getting Deck Safety Lighting Right
Most deck lighting problems trace back to placement and consistency, not product choice. Get the stairs and edges lit evenly, control glare, and use weather-rated fixtures, and the deck becomes genuinely safer after dark.
If you would rather not sort through transformer sizing, voltage drop, and code requirements yourself, that is where we come in. Get a Free Estimate and let our team design deck lighting that actually holds up.
Frequently Asked Questions
What type of lighting is best for an outdoor deck?
A mix works best. Use step or riser lights on stairs, post cap and railing lights to mark edges, and a few recessed or wall fixtures for ambient glow. Low-voltage LED systems are the most common choice because they run on a 24V system, stay cool, and use little power. Solar lights are fine for path or accent duty, but for stairs and edges, wired fixtures give more consistent light.
Where should deck lights be placed for safety?
Start with the stairs. Mount a step light on each riser or tread so every step edge is visible, and put a light at the top and bottom landing. Then light the perimeter: post cap lights on railing posts, rail lights along handrails, and recessed lights near deck edges and transitions to the yard. Keep light aimed down at walking surfaces, not out at eye level, to limit glare.
Are solar deck lights bright enough for stairs?
Often they are not. Solar fixtures depend on daytime sun and battery storage, so output drops on cloudy days and dims as the battery ages. That is risky on stairs, where a missed step causes falls. If you want solar, use it for path lights or decorative accents, and keep wired low-voltage fixtures on the stairs where reliable nighttime visibility matters most.
Are low-voltage lights a good choice for deck safety?
Yes. Low-voltage deck lighting typically runs on a 24V system, which is far safer around wood, moisture, and people than line voltage. It also handles long runs of small LED fixtures well, so you can light stairs, railings, and edges from one transformer. Choose outdoor-rated, waterproof fixtures, and size the transformer with spare capacity so you can add lights later.
How many lumens do I need to light deck steps?
For stairs, aim for roughly 50 to 100 lumens per fixture, enough to reveal each tread and riser without glare. Warm white, around 2700K to 3000K, reads comfortably at night and reduces harsh shadows. Brightness matters less than placement: a modest light aimed at the step edge beats a bright fixture shining into someone's eyes.